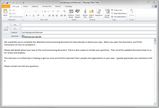
After you've customized the Intake Interview form, you can simply email it to clients to complete and then email it back to you. A CaseMap wizard is used to insert the template into a Microsoft® Outlook email, which includes that attachment with default email content that you can use or customize.

| 1. | Click the File tab, and then click Getting Started. |
| 2. | Under the Jumpstart Guide section, click Intake Interview Wizard. |
| 3. | When the wizard launches, click Next. |
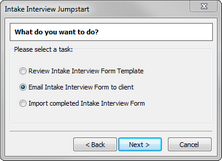
| 4. | In the What do you want to do? box, select Email Intake Interview Form to client, then click Next. |

| 5. | In the Email Document Attachment Name field, type in the name you want for the form. |
| 6. | Click Finish to generate the email. |
| 7. | Review the content in the email. |
You can modify the default content in the Subject line and body of the email as needed for your organization.
| 8. | In the To field, type in the client's email address, then click Send. |
|


