Global field replacements involve copying data into multiple field cells at one time or updating/editing data in multiple field cells at one time.
CaseMap offers the following utilities:
The Bulk Field Copy utility copies data from one field to another field for all visible records in a spreadsheet view. Any existing data in the destination field is overwritten with the new text. You must have the case open exclusively to run this utility. Be certain to notify other users to exit the case before starting.
For example, perhaps you created a custom, numeric field to track Social Security numbers and later realized that a numeric field does not allow hyphens. In this instance, you could create another custom field with a text type (alpha-numeric) to copy the SSN data from one field to another and then enter the hyphens. In this scenario, you would also add a preceding zero to the SSN for sorting purposes.
The Bulk Field Update utility updates a field with a specified value for all visible records in a spreadsheet. Any existing data values in the destination field are overwritten with the new value. You must have the case open exclusively to run this utility. Be certain to notify other users to exit the case before starting.

|
We recommend you make a backup copy of the case before making any global changes, like copying data into multiple fields. Once the process is completed, you cannot undo the changes without restoring a backup copy of the case.
|
| 1. | In the Case Shortcuts pane, click the icon for the spreadsheet you want to use. |
| 2. | On the Case Tools ribbon, click Update Records, and then click Bulk Field Copy. |
| 3. | In the message box, click OK if you have made a backup of the case. |
| 4. | Optional: Click Yes to open the case exclusively and you have already notified other users to exit the case. |
| 5. | Optional: Click OK to continue. |
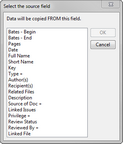
| 6. | In the Select the source field dialog box, select the field that data will be copied from, then click OK. |

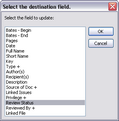
| 7. | In the Select the destination field, select the field that data will be copied into, the click OK. |
| 8. | In the message box, review the fields and records, then click Yes. |
When the process completes, you receive a message indicating the number of successful records updated.
| 10. | Return to the spreadsheet to verify the data transfer for the selected fields. |
|
| 1. | In the Case Shortcuts pane, click the icon for the spreadsheet you want to use. |
| 2. | On the Case Tools ribbon, click Update Records, and then click Bulk Field Update. |
| 3. | In the message box, click OK if you have made a backup of the case. |
| 4. | Click Yes to open the case exclusively and you have already notified other users to exit the case. |
| 6. | In the Select the destination field dialog box, select the field you want to update, then click OK. |

| 7. | In the Bulk Field Update dialog box, select an update mode, then click OK. |

| 8. | In the message box, verify your selections, then click Yes. |
Notice that all fields now contain the updated value, inserted/appended/replaced text, etc., as you selected.
|


