The Roles pane allows you to view a complete listing of roles based on case users or case administrators. Setting up roles allows you to quickly apply permissions for new CaseMap and TextMap case users because each role already contains pre-defined permissions.

Use the Role pane to:
| • | View a complete listing of roles for a case database |
| 1. | In the CaseMap Server pane, right-click Roles. |
Or click on the View menu and then click Roles.
| 2. | Click the New Role button on the toolbar. |
| 3. | In the New Role dialog box, type in the role name in the Name field. |

| 4. | In the Description field, type in the role description. |
| 5. | In the Permissions box, select the check boxes for the permissions you want this role to have. |
| 6. | Click Create to create the role. |
The new role now displays in the Roles pane.
| 7. | Continue to create roles with varying permissions until you have the templates you need to create users. |
| 8. | Click Close when you are finished. |

|
You can also verify any disabled permissions for a user in either CaseMap or TextMap by clicking the Help menu, then clicking About LexisNexis CaseMap/TextMap, and clicking the Disabled Features button.
|
|
| 1. | In the CaseMap Server pane, click Roles. |
Or click on the View menu and then click Roles.
| 2. | Right-click on the role you for which you want to view properties. |
| 3. | Click the Role Properties button. |
Or click on the Action menu and then click Role Properties.
| 4. | In the Role Properties dialog box, click on the Users tab. |
| 5. | Click the Add button to add a user account to this role. |
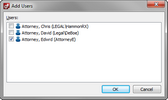
| 6. | In the Add Users dialog box, select the user account, then click OK. |

The selected user(s) now display in the Users tab in the Role Properties dialog box.
| 7. | To remove a user from a role, select the users in the Users tab, then click the Delete button. |
|


