You can bulk import users from an Active Directory group using the Import Users Wizard. The wizard allows you to search for individuals by domain group, but you can also run common queries to locate a specific group. Once users are verified in Active Directory, the wizard allows you the option of assigning them to roles already created in the CaseMap Admin Console. You can also wait and assign users to roles after the import process completes.
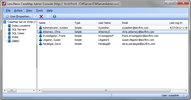
Users imported into the CaseMap Admin Console will display on the Users pane. Each user's name, type, user name, and email is automatically imported too during this process. Existing CaseMap Server users will not be duplicated during the import. If you cancel the query during the import process, only users successfully imported at that point will be added.
| 1. | In the CaseMap Server pane, right-click Users. |
| 2. | On the Action menu, click Import Users. |
You can also right-click on Users and select Import Users.
| 3. | When the Import Users Wizard launches, click Next. |
| 4. | On the Active Directory Group page, type in the domain and group name of the Active Directory group for which you want to import users. |
The wizard will not import users from sub-groups of the specified group.

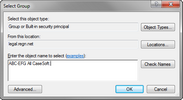
| 5. | Click the Browse button to open the Select Group dialog box and search for a group. |

| 6. | Click the Object Types button to select the types of objects you want to find, then click OK. |
| 7. | Click the Locations button to select the directory location you want to search, then click OK. |
| 8. | In the Enter the object name to select box, type in the group name that you want to locate. |
| 9. | Click the Check Names button to verify the object in Active Directory. |
| 1. | Click the Advanced button if you want to run a common query to locate users. |
The Select Group dialog box now displays a Common Queries section.

| 2. | In the Name list, select Starts with or Is exactly for how you want to search for a group. |
| 3. | Type in the group name in the box. |
| 4. | If you want to add additional columns to the search results, click the Columns button. |

| 5. | In the Columns available box, select the column you want and click the Add button, then click OK. |
Select columns in the Columns shown box and click Remove to remove them the display results.
| 6. | Click the Find Now button to run the query. |
| 7. | In the Common Query Results box, click on the group you want, then click OK to add it to the Select Group dialog box. |
| 8. | Click the Stop button to cancel the query, if needed. |
| 9. | In the Common Queries Results box, click the group you want to import, then click OK. |
The group now displays in the Select Group dialog box.
|
| 10. | Click the Next button to validate the group. |
| 11. | The Processing Group page displays the search progress and the number of users found. |
| 12. | On the Users to Import page, select the check box for each user you want to import, then click Next. |
Select the Select All check box to import all users in the specified group.
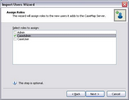
| 13. | On the Assign Roles page, select the check box for the role you want to assign to imported users, then click Next. |

You can also wait to assign roles in the CaseMap Admin Console after the import.
| 14. | In the Ready to Import page, verify the number of users and roles, then click Next. |
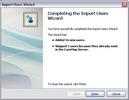
| 15. | On the Completing the Import Users Wizard page, verify the number of users successfully imported and/or skipped, then click Finish. |

The number of existing CaseMap Admin Console users will display as skipped. In addition, the number of any users who were skipped to due errors are also displayed on this page.
Imported users now display in the Users pane of the CaseMap Admin Console. You can now assign users to roles and cases.
|


