| 1. | In the Transcripts pane, click on the transcript you want to use in the report. |
| 2. | On the Reports ribbon, click Transcript w/ Annotations. |
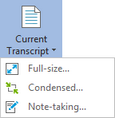
You can also click Print on the File menu, and then click Current Transcript.

| 3. | On the Transcript with Annotations submenu, click Footnotes, Endnotes - Full-size Transcript, or Endnotes - Condensed Transcript. |
See Understanding layout options for details.
| 4. | On the Transcript Report Wizard's Welcome page, click Next. |
| 5. | On the Limit Annotations by Issue page, choose one of the following: |
| • | Yes, include all annotations. |
| • | No, only include annotations linked to the selected issues. |
In the Select issues to include box, select the check box next to each issue you want to include.
| 6. | On the Linked CaseMap Facts page, choose one of the following: |
| • | Yes, include linked facts. |
| • | No, do not include linked facts. |
To include facts from CaseMap, you must first have the corresponding case open in CaseMap.

|
By default TextMap includes three of CaseMap's Facts spreadsheet fields in reports: Date & Time, Fact Text, and Status. To customize CaseMap fields included in TextMap reports, see the Changing page setup options topic, Steps 8-10.
|
| 8. | On the Include Word Index page, choose one of the following: |
| • | Yes, include a word index. |
| • | No, do not include a word index. |
| 10. | On the Completing the Report Wizard page, click Finish to generate the report. |
| 11. | In the Print dialog box, under Destination, click the print output you want. |
The print options will change depending on your selection. See Selecting print output options.

|
We recommend you select Preview first to verify your report before printing a hard copy or saving the report as a PDF file. You can select your print options from the Print Preview toolbar.
|
| 12. | Select additional print options, then click OK. |
|


