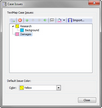
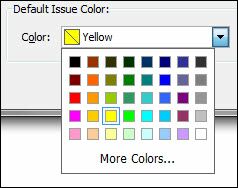
New case issues are automatically assigned the default color of yellow. You can change the default color in the Color list in the Case Issues dialog box.
Organize your case issues by adding sub-level issues to parent or primary level issue. Color-coding issues helps you identify annotations that are linked to each issue, especially when there overlapping annotations in a particular section of a transcript. See Linking issues to annotations.
1. | On the File menu, click Case Setup, and then click Case Issues. |
2. | In the Case Issues dialog box, click Add . |
3. | In the New Issue dialog box, type in the name of the issue, then click OK. |

The new issue displays in the TextMap Case Issues list in the default issue color of yellow.

|
To edit or rename an issue, click on the issue and then click the Rename icon .
|
4. | Continue adding case issues until the issues list is complete. |

You can return and add new issues here at any time.
5. | Click on an issue and then click the Demote icon to create a sub-level or child issue like Background. |
Click the Move Up, Move Down, Promote or Demote icons to organize the issues list.

|
If you right-click on an issue in the Case Issues dialog box, a submenu displays with the same options available on the Case Issues toolbar.
|
6. | Click on an issue and then click on the arrow next to the Color button . |
7. | In the color palette, click on the new color you want to use for this issue. |

All annotations linked to this issue will display in the transcript in the selected color. Transcripts with overlapping annotations will display color bars to the right of the transcript for each linked issue, so you can easily identify where overlapping annotations occur.
8. | Click Close when you are finished. |
|
1. | On the File menu, click Case Setup, and then click Case Issues. |
2. | In the Color list, under Default Issue Color, click on the color you want. |

3. | Click Close to save your changes. |
|