| 2. | On the Reports ribbon, click the Document Production icon  . . |
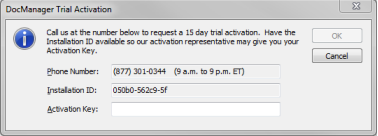
If DocManager is not activated on your system, the DocManager Activation dialog box displays
| 3. | In the Documents to Include dialog box, select the documents to be used in the production set using one of the following options: |
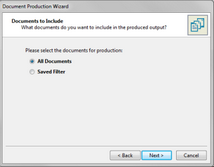
If you selected All Documents, click Next to continue to the Review Documents screen.
|
If you selected Saved Filter, use the Select a Filter drop-down to select a saved filter from the menu, and then click Next to continue.
|

|
Saved filters are limited to the Document object type.
|
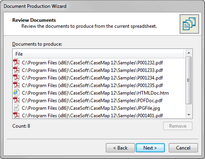
| 4. | In the Review Documents dialog box, review the list for to ensure that all documents based on the count are present, and then click Next. |
The Review Documents dialog box displays.

| 5. | Conditional: In the Review Documents dialog box, if there were no documents returned, click the Back button, select another option, and then click the Next button to continue. |
| a. | In the Review Documents dialog box, highlight the document(s) to be removed, and click the Remove button. |
The document(s) is/are removed, and the number of documents listed in the Count area is decreased.
|
| 6. | In the Bates Stamps Options dialog box, select the Bates stamp options to be applied to the documents. |
| a. | In the Bates Stamp Options dialog box, select and apply the Bates stamp options for the document. |

|
Bates stamps previously applied with DocPreviewer will be replaced with Bates stamps applied during production to avoid duplication.
|
| b. | Optional: In the Prefix field, type in a prefix that will be used to assist in identifying the files. |
The prefix precedes each Bates stamp number and can be any combination of letters, numbers, or punctuation.
| c. | In the Start At field, type in the start number for the Bates numbering. |
The starting Bates number must be greater or equal to the number one.
| d. | In the Digits list, click on the number of digits you want for preceding zeros. |
This number defaults to six.
| e. | Review the updated Bates stamp numbering scheme in the Starting Bates stamp area. |
| f. | In the Font list, click on the font type you want to use. |
| g. | In the Size list, click on the font size you want to use. |
| h. | For the Style check boxes, click if you want Bold or Italic. |
| i. | In the Location list, click the location where you want the Bates stamp to print. |
| j. | Optional: Click the Shrink document to fit the Bates stamp check box, if you need this option. |
If selected, the document content is re-sized so the Bates stamp does not overlap document content in the printed output.
| k. | Click Next to continue. |
|
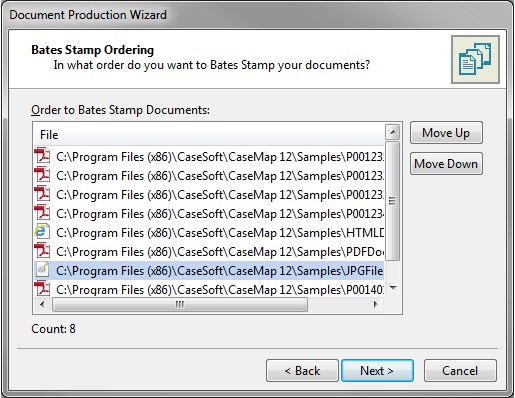
| 7. | In the Bates Stamps Ordering dialog box, review the order of the documents to be Bates stamped, and if as desired, click Next to continue. |
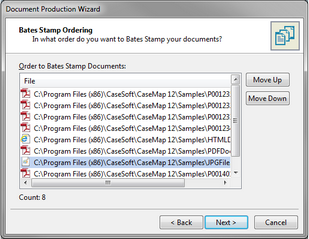
| a. | Under the Order to Bates Stamp Documents area, review the order of the documents in the list. |
| b. | Select/highlight the document in the list to change the order/location. |
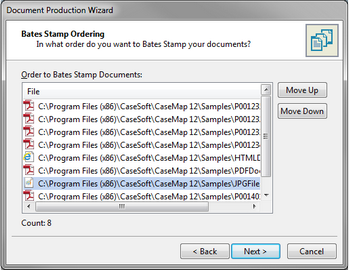
| c. | In the Options area, click the Move Up or Move Down button to move the document up or down in the list. |
| d. | Repeat the previous steps as necessary until all documents to be Bates stamped are in the desired order. |
| e. | Click Next to continue. |
|
| 8. | In the Documents to Exclude dialog box, identify the documents to be excluded from the output by selecting one of the following options: |
| a. | In the Documents to Exclude dialog box, select the Withheld documents - privileged with no redactions option to continue. |

|
If no documents are returned, a warning and information message is displayed at the bottom of the dialog box.
|
| b. | In the Documents to Exclude dialog box, click Next and proceed to Step 10. |
|
| a. | In the Documents to Exclude dialog box, select the Saved Filter option to continue. |

| b. | Use the Saved Filter box to select a filter. |
|
If no documents are returned, a warning message is displayed.
|
| c. | Conditional: Based on the displayed warning message, use the Saved Filter box to select another filter. |
| d. | Click Next to continue. |
The Placeholders for Excluded Documents dialog box displays.

| e. | In the Placeholders for Excluded Documents dialog box, select one of the following: |
| i. | The Select Document fields to include on the placeholder options are activated. |
| ii. | In the Placeholders for Excluded Documents dialog box, select each applicable Document field to be included on the placeholder. |
| iii. | Click Next to continue. |
|
No other options are available, therefore, click Next to continue.
|
|
| a. | In the Documents to Exclude dialog box, select the Do not exclude documents in the production set option to continue. |

|
If Do not exclude documents in the production set is selected, then the Documents to Exclude dialog box and other excluded document actions are omitted. Proceed to Step 10.
|
| b. | Click Next to continue. |
|
The Header and Footer dialog box displays.
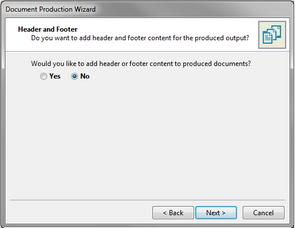
| 9. | In the Header and Footer dialog box, click Yes or No to continue: |
The Header and Footer dialog box displays.

| a. | In the Header Text box, click the drop-down arrow and select the appropriate header text. |
| b. | In the Location box adjacent to the Header Text box, click the drop-down arrow and select the location in the document where the header text will be placed. |
|
The text string for header content is always placed directly above the header, no matter the location.
|
| c. | In the Footer Text box, click the drop-down arrow and select the appropriate footer text. |
| d. | In the Location box adjacent to the Footer Text box, click the drop-down arrow and select the location in the document where the footer text will be placed. |
|
The text string for footer content is always placed directly beneath the footer, no matter the location.
|
| e. | In the Apply to area, select one of the following: |
Select the 'All Documents' radio button to apply the header/footer content to all documents.
Select the 'Saved Filter' radio button to apply the header/footer content only to documents that are utilizing saved filters.
Optional: If you selected "Saved Filter' above, then In the Saved Filter box, click the drop-down arrow and select the appropriate filter.
| f. | In the Header and Footer dialog box, click Next to continue. |
|
| a. | Click Next to continue. |
|
| 10. | In the Document Content Colors dialog box, select a color option to be used: |

Use the original document content colors: the colors inside the document(s) remain as they are.
Convert all of the document content color to grayscale: all document content is converted to grayscale.
Display text in the document in black: all text is in black.
| 11. | Click Next to continue. |
The Output Format dialog box opens.

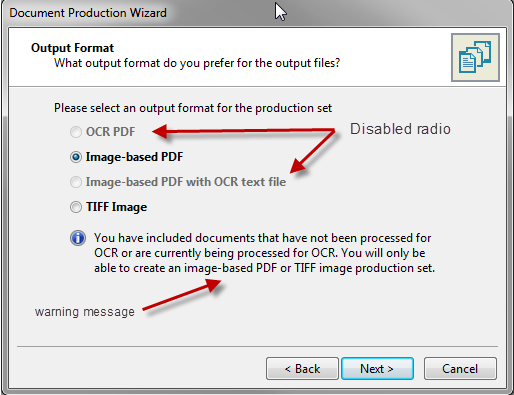
| 12. | In the Output Format dialog box, select the format of the file(s) to be output: |
OCR PDF
Image-based PDF
Imaged-based PDF with OCR text file
TIFF Image
|
When the 'OCR PDF' and 'Image-based PDF with OCR text file' options are disabled, a warning message displays in the dialog as indicating that documents have been included in the production set that have not been OCR'd. When this is the case, only the 'Image Based PDF' option can be used when selecting the output format..
|
| 13. | Click Next to continue. |
| 14. | In the Output Destination and File Naming Convention dialog box, click the Browse button to select the output destination/folder location. |

| 15. | In the Choose a file naming convention area, select the naming convention format: |
Use beginning bates: the number associated with the Starting Bates stamp (e.g., 00001)
|
CaseMap's default behavior is to use the beginning Bates number as the full name and to create the short name.
|
Use original file name: the name currently used for the file
| 16. | Click Next to continue. |
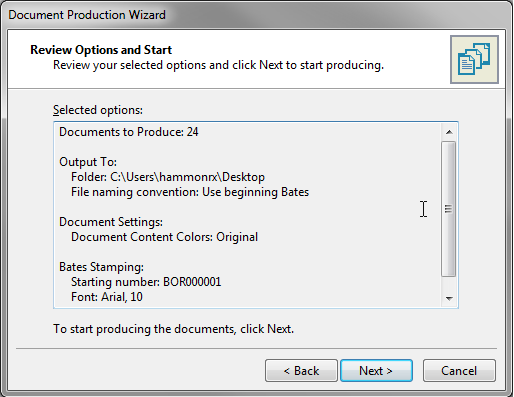
The Review Options and Start dialog box opens.

| 17. | In the Review Options and Start dialog box, review your selected options and click Next to continue. |
The Producing documents dialog box displays.
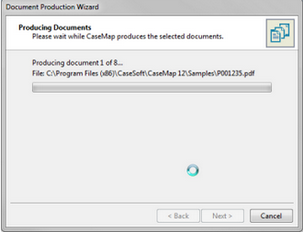
| 18. | Please wait while the selected documents are processed. |
The Completing the Document Production Wizard Completion screen displays. dialog box displays.
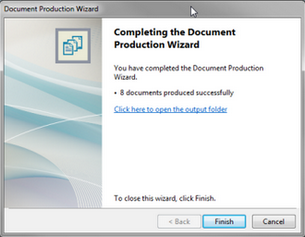
| 19. | Perform one of the following: |
Optional: In the Completing the Document Production Wizard Completion dialog box, click Finish.
-or-
Optional: In the Completing the Document Production Wizard Completion dialog box, click the Click here to open the output folder link to view the list of documents.
|