You can send facts from a document open in Microsoft® Word (2007 and later) (32-bit versions) to CaseMap. This creates entries for the document itself and for the fact you entered. As part of the process of sending the fact, you can identify persons, organizations, and places, named in the fact text, adding them to the Persons, Organizations, and Places spreadsheets respectively. Alternatively, if you only want to send the document to CaseMap without sending a fact, you can do that too. By default, the document is added to the Documents spreadsheet. However. you can add it as a pleading, discovery, demonstrative evidence, or any other object type.
Find this feature
| • | Open Word, and click the CaseMap tab. CaseMap commands appear on the ribbon. The Word plug-in is optional during CaseMap installation. |

Tips about sending documents and facts to CaseMap from Word
| • | We recommend that the Word document is completed and no longer needs editing before you send fact text to CaseMap. This ensures that CaseMap will select the correct text of the document to display in the case record. |
| • | If you try to send a document that has already been sent to CaseMap, you will receive a message box indicating that the document is already linked to a case record. CaseMap recognizes duplicates as long as they are stored in the same folder and have the same file path. If the file is renamed or moved, CaseMap will create a new document record for it. |
| • | Send small, granular text selections as facts. To avoid the chance of obscuring important facts, select and send text that reflects one fact at a time. |

|
If you are working in the Word document and want to quickly locate the document record in the case, click the Go to CaseMap document button. See To view the Word document in CaseMap below.
|
Once Word documents are sent to the case, you can still edit the document record in CaseMap by clicking the Edit CaseMap Document button on the CaseMap ribbon. See To edit a Word document sent to CaseMap below.
| 1. | Open the CaseMap case that you want to import data into from Word. |
| 2. | Open the Word document that contains the text that you want to send to the case. |
| 3. | In the Word document, click the CaseMap tab. |
| 4. | Highlight the information you want to import into a case spreadsheet, then click Send to CaseMap - Add Fact. |
You can also right-click and then click Send to CaseMap - Add Fact.

|
If you have not saved the document to a file, then a message box displays stating that you need to save the document and try again.
|
| 5. | In the Send to CaseMap - New Fact box, click Document. |

| 6. | In the Enter a name for the new Document field, the file name of the document without the extension is entered by default. Edit this value if necessary. |
| 7. | In the Enter the assigned short name field, a value is added by default, based in part on the file name. Edit this value if necessary. |
| 8. | Click OK.
The Edit the CaseMap Fact dialog box opens. |
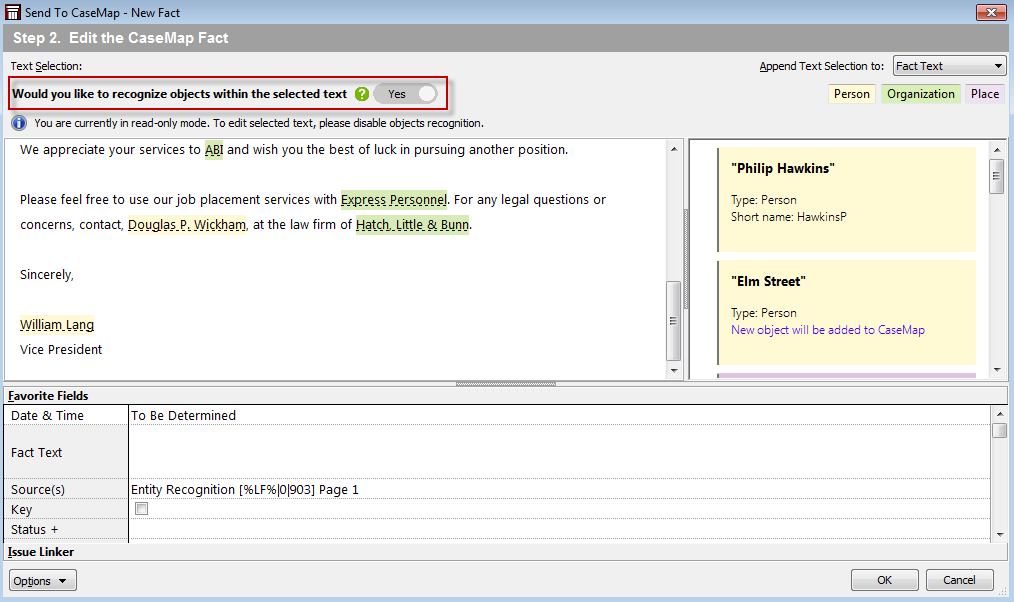
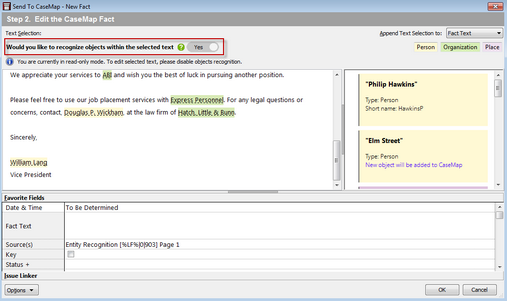
| 9. | In the Send to CaseMap – New Fact box, select Fact Text in the Append Text Selection to field so that the excerpt displays in the Facts spreadsheet.
Notice that the text you selected from the Word document displays in the Text Selection field and is enclosed in brackets. |

|
Do not delete the brackets from text excerpts imported using the Send to CaseMap utility. Brackets prevent CaseMap's recognition of short names and designate actual document text for the import.
|
| 10. | To enable object recognition, in the Would you like to recognize objects within the selected text section, slide the button to the right. The steps to use object recognition are described in the next section. To skip object recognition, go to the next numbered step in this procedure. For more information on using object recognition, see: About Object Recognition for Fact Entry. |
To use object recognition when sending a fact to CaseMap
| • | Suggested instances in the selection of Persons, Organizations, and Places are listed on cards in the panel to the right. Each card indicates whether a match was found to an existing object. |
| • | Suggested matches are also highlighted in the fact selection box. |
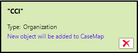
| • | Both cards and text highlighting are color-coded: Persons as yellow, Organizations as green, and Places as pink. |
| • | CaseMap locks the selection text from editing. |
Review the highlighted match suggestions and cards:
| • | To reject a suggested match, either click the highlighted text then click the X.

Or click the X on the lower right corner of the card.
 |
| • | To change a suggested match from one type to another, click the card for the match, click the Type field, and select a new type.
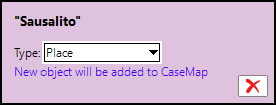 |
| • | To designate text as a new object, select the text, right-click the selection, and then click Person, Organization, or Place.
 |
After adding an object, its card moves to the bottom of the left pane.
|
| 13. | In the Date & Time field, type in the date of the fact.In the Fact Text field, type in a fact summary/short description of the imported text. |
| 14. | This text description displays in the Fact Text field in the Facts spreadsheet and appears as a Fact Card in the Fact Cards view. |
| 15. | Select the Key check box, if this fact is important to the case. |
| 16. | In the Status field, select whether the fact is disputed or not. |
| 17. | Click the Issue Linker bar to link the fact directly to issues, then click OK to initiate the import process. |
| 18. | In the message prompt, click Yes to view the new fact record in the Facts spreadsheet. |
| 19. | Click in the Fact Text field for this fact record to view the highlighted text you sent from the Word document. |
| 20. | Click on the paperclip icon for the fact record to view the linked path to the source file in Word. |
| 21. | Scroll to the right and notice that the Source(s) field displays the linked element to the Word document and that the Linked Issue field displays any issues added for this record. |
| 22. | Click All Objects in the Case Shortcuts pane to see newly identified objects (Persons, Organizations and Places) added to the Object spreadsheets. |
|
| 1. | Open the CaseMap case that you want to import data into from Word. |
| 2. | Open the Word document that you want to send to the case and click the CaseMap tab. |
| 3. | In the Word document, click the Send to CaseMap - Add Object button to open the Send to CaseMap dialog box. |
You can also right-click on the Word document and click Send to CaseMap - Add Object.

|
If you have not saved the document to a file, then a message box displays stating that you need to save the document and try again.
|
| 4. | In the Object Type list, select the object type, for example Document. |
| 5. | In the Full Name and Short Name fields, review or edit the default Word document title and short name as needed. |
| 6. | Click the Save button to continue. |
| 7. | In the message box, click Yes to view the new document record in CaseMap. |
Notice that the new record now displays in the selected object spreadsheet.
| 8. | Click on the paperclip icon for the record to view the linked path to the source file in Word. |
The document is now an object record in the case with a link to the source file saved in a folder.
|
| 1. | Open the Word document that you have already sent to the case. |
| 2. | On the CaseMap ribbon, click the Edit CaseMap Document button. |
| 3. | In the Send to CaseMap - Edit dialog box, modify any of the record's Favorite Fields as needed. |

| 4. | Click the Issue Linker bar to link the record directly to a case issue. |
| 5. | Click OK to save your edits. |
The new record information is now saved in the case spreadsheet.
|
| 1. | Open the Word document that you have already sent to the case. |
| 2. | On the CaseMap ribbon, click the Go to CaseMap Document button. |
CaseMap opens the spreadsheet where the record is saved and highlights the applicable record.
|