The CaseMap Admin Console is the Windows desktop application providing user interface access for the CaseMap Server. Installation of the CaseMap Admin Console is fairly simple and done using an install wizard. Install the CaseMap Admin Console to the desktop of any user who will be administering CaseMap and TextMap cases and users. The CaseMap Admin Console supports both Windows and simple authentication.
The install utility will prompt you to enter the URL to the CaseMap Server. The URL should end with "CMServerAdmin.svc".
The CaseMap Server automatically creates a system administrator user with a default user name and password:
Once you log into the CaseMap Admin Console for the first time using the sysadmin user account you can change the default password. The sysadmin password can be modified by clicking Tools > Options.
After installing the CaseMap Admin Console, you can register one or more SQL Servers inside your organization that will host your CaseMap or TextMap SQL cases.
Once databases are registered, you can then set up the following users:
| • | CaseMap or TextMap client users who need access to SQL cases |
| • | CaseMap Admin Console users who can administer cases and users |
The CaseMap Admin Console is the only place you can create new CaseMap or TextMap SQL cases. Once the case is created, you can assign it to users with local or Active Directory type authentication. Use the CaseMap SQL Import Utility or the Import Local Cases Utility to migrate existing case files from the Access database format to the SQL database format. See About migrating cases.
| 1. | Click on the CMAdmin21Setup.exe file to launch the CaseMap Admin Console install utility. |
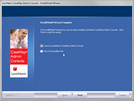
| 2. | When the InstallShield Wizard launches, click Next. |

| 3. | In the License Agreement box, select the I accept the terms of the license agreement. |

| 4. | Click the Print button to print a copy of the license agreement, then click Next. |
| 5. | In the Information dialog box, review the important installation information, then click Next. |

| 6. | In the Name field of the Default CaseMap Server dialog box, type in the CaseMap Server name. |
 C C
| 7. | In the URL field, type in the Server URL, then click Next. |
| 8. | In the Choose Destination Location dialog box, verify whether the default destination folder is the appropriate location. |

The default folder is C:\Program Files\CaseSoft\CaseMap Admin Console.
Click the Browse button to change the destination folder and choose a different folder.
| 9. | Click Next to continue. |
| 10. | In the Start Copying Files dialog box, review the current install settings, then click Next. |

If you want to modify any settings, click the Back button.
| 11. | In the InstallShield Wizard Complete dialog box, select the Launch the CaseMap SQL Admin Console check box. |
Select the View the ReadMe File check box if you want to review the file.

The CaseMap Admin Console automatically launches and is ready for you to register a CaseMap Server.
| 13. | In the Connect to CaseMap Server dialog box, select Local User. |

| 14. | In the User Name field, type sysadmin. |
| 15. | In the Password field, type in password. |
| 16. | Click Connect to continue. |
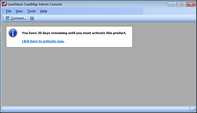
| 17. | In the CaseMap Admin Console, click the Click here to activate now hyperlink. |

| 18. | In the CaseMap Admin Console Software Activation dialog box, click Next to open the Enter your registration information dialog box. |

| 19. | In the Registration Name field, type in your user name for license registration. |

| 20. | In the Registration ID field, type in your registration ID. |
| 21. | In the Product ID field, type in the TextMap license number. |
| 22. | Click Next to continue. |
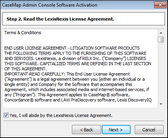
| 23. | In the Read the LexisNexis License Agreement dialog box, read the license agreement and then select the Yes, I will abide by the LexisNexis License Agreement check box. |

| 24. | Click Next to continue. |
| 25. | In the How do you want to activate this product dialog box, select the activation option you want to use. |
| • | Activate software online — Use this option to activate online with an active internet connection. |
| • | Activate by web browser or phone — Use this option if you received an activation key via email. |
| 26. | Click Next to continue. |
| 27. | In the Summary of online activation transmission information dialog box, review the license registration information. |
| 28. | Click Finish to complete the activation. |
| 29. | In the message box confirming CaseMap Admin Console activation, click OK. |
| 30. | In the CaseMap Admin Console, click the Connect button. |

| 31. | In the Connect to CaseMap Server dialog box, select Local User. |
| 32. | In the User Name field, type sysadmin. |
| 33. | In the Password field, type in password. |
| 34. | Click Connect to continue. |
The CaseMap Admin Console now opens with a connection to the registered server.
You can now install the CaseMap SQL Import Utility program, if you plan on migrating existing CaseMap local cases to the CaseMap Server.
|


