CaseMap gives you the ability to create and to remove (delete) an individual redaction. When a redaction is removed/deleted, the original text is restored (restricted/hidden text removed) to the document.
| 1. | In the Case Shortcuts pane, click Documents to navigate to the Documents spreadsheet. |
| 2. | In the Documents spreadsheet, select and click on the linked document (paperclip icon) to be opened/viewed. |

|
If CaseMap DocManager is not activated, you will be prompted activate it at the time you're attempting to view a document, or to obtain a trial copy. See Document production processing for additional information.
|
CaseMap DocManager opens displaying the selected linked file.

|
If the 'Dock in Spreadsheet' option to view documents had been selected in the DocManager for a previous document viewing, then all subsequent document viewings will be done via the DocManager being docked within the CaseMap application. See Docking and undocking the DocManager for additional information.
|
| 3. | In the DocManager, click the Home ribbon, and then click Select Redactions. |
| 4. | In the document, select and click on a created redaction. |
The Delete button is enabled.
| 5. | On the Edit and Print tab, click Delete. |
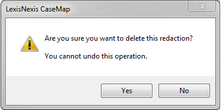
A confirmation dialog box displays.

| 6. | In the confirmation dialog box, click Yes to confirm the deletion/removal. |
The redaction is deleted and the hidden/restricted information is displayed as in the original document.
| 7. | In the DocManager, click the Home ribbon, and then click Close to close the DocManager. |
|

