When editing a redaction, you have the ability to change/modify the redaction reason or the redaction selection itself. Utilizing the redaction Edit capabilities also provides you with access to CaseMap DocManager General, Printing, and Hit Highlighting options.
| 1. | In the Case Shortcuts pane, click Documents to navigate to the Documents spreadsheet. |
| 2. | In the Documents spreadsheet, select and click on the linked document (paperclip icon) to be opened/viewed. |
CaseMap DocManager opens displaying the selected linked file.

|
If the 'Dock in Spreadsheet' option to view documents had been selected in the DocManager for a previous document viewing, then all subsequent document viewings will be done via the DocManager being docked within the CaseMap application. See Docking and undocking the DocManager for more information.
|
| 3. | In the DocManager, click the Home ribbon, and then click Select Redactions. |
| 4. | In the document, select and click on a created redaction. |
The Edit button is enabled.
| 5. | On the Edit and Print tab, click Edit, and then click Redaction Properties. |
The Edit Redaction dialog box displays.
| 6. | In the Document Text area, verify that the correct redaction content is displayed. |
| 7. | In the Redact Reason area, use the drop-down arrow to select/change the redaction reason. |
| 8. | Click OK to save the changes and to close the Edit Redaction dialog box. |
|
| 1. | In the Case Shortcuts pane, click Documents to navigate to the Documents spreadsheet. |
| 2. | In the Documents spreadsheet, select and click on the linked document (paperclip icon) to be opened/viewed. |
CaseMap DocManager opens displaying the selected linked file.
|
If the 'Dock in Spreadsheet' option to view documents had been selected in the DocManager for a previous document viewing, then all subsequent document viewings will be done via the DocManager being docked within the CaseMap application. See Docking and undocking the DocManager for more information.
|
| 3. | In the DocManager, click the Home ribbon, and then click Select Redactions. |
| 4. | Select and click on a redaction within the document. |
The selected redaction displays with the ability to adjust its width/height.
| 5. | Make width/height adjustments to the redacted area as applicable. |
| 6. | On the DocManager Home ribbon, click the Close button to save changes/updates to the redaction selection. |
|
| 1. | In the Case Shortcuts pane, click Documents to navigate to the Documents spreadsheet. |
| 2. | In the Documents spreadsheet, select and click on the linked document (paperclip icon) to be opened/viewed. |
CaseMap DocManager opens displaying the selected linked file.
|
If the 'Dock in Spreadsheet' option to view documents had been selected in the DocManager for a previous document viewing, then all subsequent document viewings will be done via the DocManager being docked within the CaseMap application. See Docking and undocking the DocManager for more information.
|
| 4. | In the DocManager, click the Home ribbon, and then click Select Redactions. |
| 5. | Select and click on a redaction within the document. |
The selected redaction displays with the ability to adjust its width/height.
| 6. | On the Home tab of the DocManager, click Edit, and then click Options. |
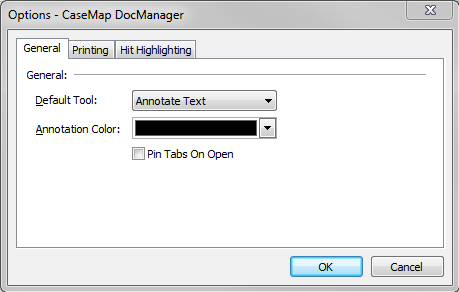
The Options - CaseMap DocManager dialog box opens.
| 7. | Optional: Click the General tab and make adjustments to the Default Tool and the Animation Color areas as applicable. |
| 8. | Optional: Click the Printing tab and make changes/updates as applicable. |
| 9. | Optional: Click the Hit Highlighting tab, and make changes as applicable. |
|