When first entering research in a new case, you have options for how you may want to proceed. Review each option and decide what works best for the case and case staff. Regardless of your choice, we recommend that you first enter/import research data into the Authorities spreadsheet to list case law, statutes, regulations, rulings, and articles you want to reference. Then extract passages that you want to track and copy in the Extracts from Authorities spreadsheet. Data entered in spreadsheet cells is automatically saved as you navigate to a new cell or record.
You can enter research by:
| • | Typing research data into spreadsheets (manually) |
| • | Importing data from a case law web site (Send To feature) |
| • | Importing data from research saved as PDF files (Send To feature) |

|
Attachments linked from www.lexis.com using the Send to CaseMap tool may be compromised when web site data is updated or refreshed. Additionally, links to web sites only reference the page you mark. The link does not return you to the excerpt of the authority you located.
We strongly recommend that any authorities included in your case are first saved as Adobe® Acrobat PDF files. You can store these files in network folders and attach the source file to the research record in the Research Authorities spreadsheet. You can then highlight extracts in the PDF file and send the data to the Research Extracts and Authorities spreadsheet.
|
| 1. | In the Case Shortcuts pane, click on the Authorities icon in the All Shortcuts pane. |
| 2. | In the Name cell, type in the name of the authority. |

| 3. | In the Jurisdiction cell, type in the jurisdiction from which the precedent came. |
| 4. | In the Type cell, click on the authority type or type a new entry to add to the list. |
| 5. | In the Citation cell, type in the citation for the authority. |
You can list multiple citations if needed.
| 6. | In the Description cell, type in information defining the authority. |
If you type using short names in the Description or Notes cells, you will link the authority to an object (people, organizations, documents, etc.).
| 7. | In the Notes cell, type in any additional information regarding the authority. |
| 8. | Click the New Record button on the Standard toolbar and then click Research Authority. |
| 9. | Continue entering research authority records as needed. |
You can also press the Insert key to add a new blank record into a spreadsheet.
Data entered in spreadsheet cells is automatically saved as you navigate to a new cell or record.
For information on analyzing research data and using other fields in this spreadsheet, see Analyzing and linking research.
|
| 1. | In the Case Shortcuts pane, click on the Extracts from Authorities icon in the All Shortcuts pane. |
| 2. | In the Authority Name cell, select the name of the authority from which the extract is being pulled by using the drop-down list. |

| 3. | In the Extract Text cell, type in the extract text from the authority. |
You can also copy/paste extract text in this cell.
| 4. | In the Description cell, type in information defining the authority extract. |
If you type using short names in the Description or Notes cells, you will link the authority to an object (people, organizations, documents, etc.).
| 5. | In the Notes cell, type in any additional information regarding the authority. |
| 6. | Click the New Record button on the Standard toolbar and then click Research Authority Extract. |
| 7. | Continue entering research authority records as needed. |
You can also press the Insert key to add a new blank record into a spreadsheet.
Data entered in spreadsheet cells is automatically saved as you navigate to a new cell or record.
For information on analyzing research data and using other fields in this spreadsheet, see Analyzing and linking research.
|
| 1. | In the Case Shortcuts pane, click on the Research > Extracts from Authorities icon in the All Shortcuts pane. |
| 2. | Log on to www.lexis.com to perform the searches you need to run. |
| 3. | When you have found the document you want, highlight the text you want to send as an extract to CaseMap. |
| 4. | Right-click on the highlighted text and click Send to CaseMap. |
| 5. | In the Send to CaseMap - New Authority Extract dialog box, select Research Authority. |
| 6. | In the Name field, type in the name of the authority, then click OK. |

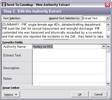
| 7. | In the Edit the Authority Extract dialog box, select Extract Text in the Append Text Select to field. |

| 8. | In the Text Selection field, review the extract you highlighted in the PDF file. |
Notice that the text is now enclosed in brackets, indicating a link is set from the extract record to the source file on www.lexis.com.
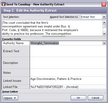
Notice that the file name is populated in the Authority Name field and the link’s file path displays in the Linked File field.
| 9. | Click on the Issue Linker bar at the bottom of the box and select check boxes for applicable issues to link this extract. |
| 10. | When you are finished, click OK to initiate the import process. |
| 11. | In the message prompt, click Yes to view the extract in the Research – Extracts from Authorities spreadsheet. |
| 12. | In the All Shortcuts pane, click the Authorities spreadsheet icon. |
| 13. | Locate the new authority record and fill in additional field information for this record. |
Click on To manually enter research in the Authorities spreadsheet and follow Steps 3-7 if needed.
| 14. | Click on the paperclip icon to the left of the record to verify the attachment link to the source file. |
For information on analyzing research data and using other fields in this spreadsheet, see Analyzing and linking research.
|
| 1. | In the Case Shortcuts pane, click on the Research > Extracts from Authorities icon in the All Shortcuts pane. |
| 2. | Next locate the authority in your case documents by navigating to research folder on your network. |
| 3. | Double-click on the PDF file to open it in Acrobat. |
| 4. | In Acrobat, click on the Select tool on the Standard toolbar and highlight the text you want to send to the Extracts from Authorities spreadsheet. |

| 5. | Right-click on the highlighted text and select Send Fact to CaseMap. |
You can also click the Send Fact to CaseMap button on the Standard toolbar.
| 6. | In the Send to CaseMap – New Fact box, select the Research Authority option, then click OK. |

Notice that the PDF file name automatically displays in the Authority Name field.
You can edit the file name here, if you want, before importing it into the case.
| 7. | In the Send to CaseMap – New Authority Extract box, click Extract Text in the Append Text Selection to field. |

| 8. | In the Text Selection field, review the extract you highlighted in the PDF file. |
Notice that the text is now enclosed in brackets, indicating a link is set from the extract record to the source file.
Notice that the file name is populated in the Authority Name field and the link’s file path displays in the Linked File field.
| 9. | Click on the Issue Linker bar at the bottom of the box and select check boxes for applicable issues to link this extract. |
| 10. | When you are finished, click OK to initiate the import process. |
| 11. | In the message prompt, click Yes to view the extract in the Research – Extracts from Authorities spreadsheet. |
Notice that the new record is automatically highlighted and sorted in with case records.
| 12. | In the All Shortcuts pane, click the Authorities spreadsheet icon. |
| 13. | Locate the new authority record and fill in additional field information for this record. |
Click on To manually enter research in the Authorities spreadsheet and follow Steps 3-7 if needed.
| 14. | Click on the paperclip icon to the left of the record to verify the attachment link to the source file. |
For information on analyzing research data and using other fields in this spreadsheet, see Analyzing and linking research.
|


