TextMap allows you to add and remove toolbar buttons and settings for your personal view.
| 1. | On the Standard toolbar, click on the down-arrow at the far right of the toolbar. |
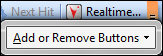
| 2. | Click the Add/Remove Buttons menu. |

| 3. | Select or deselect the buttons you want to display. |
Menu items with a check mark display on the toolbar.

|
To reset to the toolbar to its original display, click Reset Toolbar.
|
|
| 1. | On the Tools menu, click Customize. |
| 2. | In the Customize dialog box, click the Commands tab. |
| 3. | In the Categories list, click the menu where the command is located. |
| 4. | In the Commands list, click and drag the menu command to the toolbar. |
| 5. | Drop the command anywhere on the toolbar between existing buttons. |
The command now displays as a toolbar button.
|
| 1. | On the Tools menu, click Customize. |
| 2. | In the Customize dialog box, click on the Options tab. |
| 3. | In the Other area, select the Large icons check box to increase the font size for on-screen viewing. |
| 4. | Select the Show ToolTips on toolbars check box for ToolTips to display when the mouse point is placed over a toolbar button. |
| 5. | Select the Show shortcut keys in ToolTips check box for the keyboard shortcut commands to display in the toolbar button ToolTips. |
| 6. | Click Close to save setting changes. |
|
Click the Reset my usage data button to restore the default menu and toolbar command settings, except any explicit customizations.
|
|
| 1. | On the Tools menu, click Customize. |
| 2. | In the Customize dialog box, click on the Toolbars tab. |
| 4. | In the Add Toolbar dialog box, type in a name for the toolbar, then click OK. |
An empty toolbar should now display along with the other standard toolbars or displays as a floating toolbar in the main window.
|

