By default, the presentation window will display items using the full screen. However, you can configure the presentation window so that it will display up to 4 items simultaneously by dividing the full screen into multiple item windows. This topic briefly describes the controls that you need to know about to get started using multiple item windows. It then describes how to enable and use multiple item windows.
The following controls apply to displaying multiple item windows:
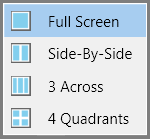
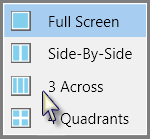
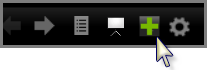
| • | Presentation layout button. Use this button on the presentation tool bar to select the maximum number of allowed item windows. The options are: full screen, 2side-by-side, 3 across, and 4 in a quadrant. |

| • | Display mode button. This toggle button allows you to set the next and previous item buttons so they apply to any open item window. After you click this button, the next and previous item buttons apply to whichever item window you next select. |

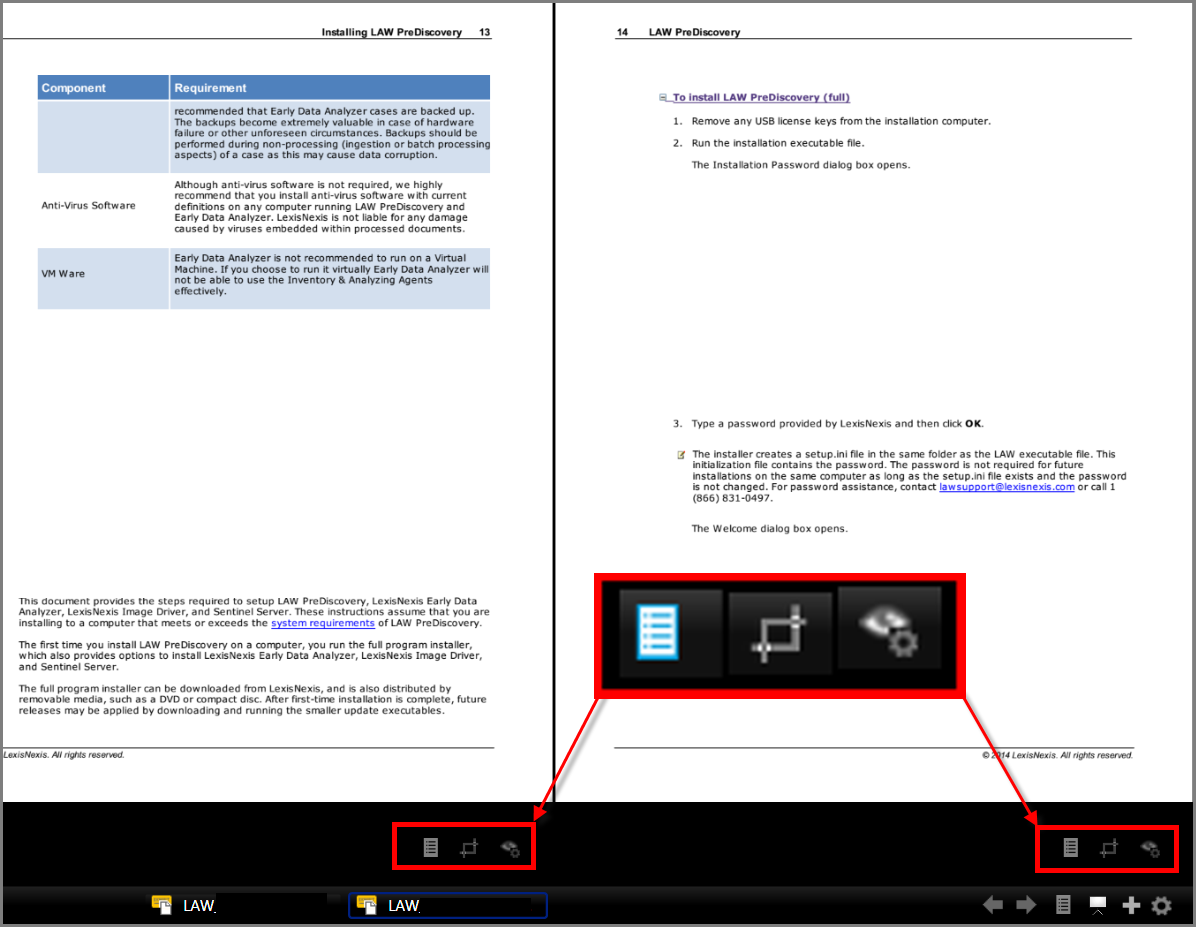
| • | Item window control buttons. Each new item window that you open is equipped with its own item selector button, annotation tools gallery, and annotation layer selector. The following screen shot shows a side-by-side layout. Both item windows have their own set of controls. |
Each item window is equipped with an item selector, annotation tools gallery, and annotation layer control.
|
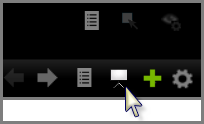
| 1. | In the presentation window, click the presentation window layout button. |
| 2. | Select a layout option. Your selection specifies the maximum number of item windows that can be open at one time. |
After selecting a layout option, the presentation window does not change until you click the Next item button
| 3. | Select the next item arrow repeatedly. Each time you click the next item arrow, the next item in the presentation opens in a new item window until the maximum number of item windows are open. |

|
These steps illustrate how to present 3 items simultaneously. The screen captures in the procedure are provided as examples.
| 1. | Create a presentation with 3 or more items in it. Or open the sample case. |
| • | To open the sample case, from the main program window on the FILE tab, click Open, click Sample Case, and then click Open. |
| 2. | Open the presentation you created, or if you opened the sample case, open the Hawkins Examination sample presentation. |
| • | To open the Hawkins Examination sample presentation, on the HOME tab, click the Presentations navigation bar, click Hawkins Examination, and then in the Present button group, click Presentation. |
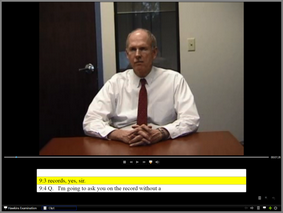
| 3. | In the presentation window, click the next item arrow. |
The first item in the presentation opens.
| 4. | In the presentation window, click the presentation window layout button. |
| 5. | Select 3 Across. The maximum number of item windows that can be open at one time will be 3. |
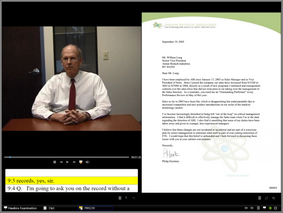
| 6. | Select the next item arrow. |
The next item in the presentation opens in a new item windows to the right of the first.
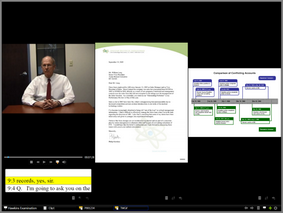
| 7. | Select the next item arrow again. |
The next item in the presentation opens in a third item windows to the right of the second.
|
By default, when the maximum number of item windows are open, the next item and previous item buttons apply to the final item window.
For example, in the following screen shot suppose the 3 Across layout option is selected. In the screen shot, three item window are open already so the maximum number of item windows for the presentation has been reached. Now, if the user selects the Next Item button, the layout will not change. There will still be 3 item windows. However, the third item window, which in the screen shot currently shows a timeline, will advance to the next item in the presentation list.
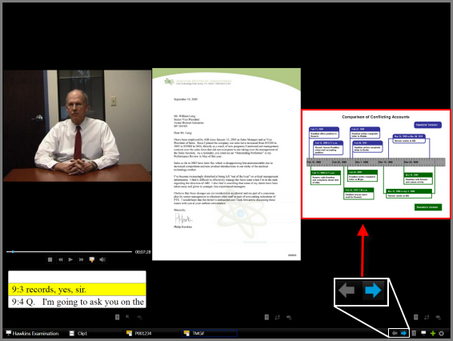
In this 3 Across layout, by default the Next button works on the third window
However, you can change this default behavior so that other item windows are responsive to the next item and previous item buttons. To learn how to accomplish this, see the next procedure.
|
| 1. | Select the display mode button so that it is toggled off, or grayed. |
Display mode is on
|

Display mode is off
|
| 2. | Do one of the following: |
| • | Select the item window you want to use the next and previous item buttons on. |
| • | Select the item name in the presentation tool bar for the item window you want to use the next and previous item buttons on. |
| 3. | Select the next and previous item buttons to move between items in the selected item window. |
|
| • | Select the Display Mode button so that is toggled off, or grayed. |
Display mode is on
|
Display mode is off
|
The maximum number of item windows that may be opened is set to the current number of item windows open.
|
| 1. | Select the display mode button so that is toggled on, or green. |
Display mode is on
|
|
| 2. | In the presentation window, click the presentation window layout button. |
| 3. | Select a layout option. |
The maximum number of item windows is set to your selection. Any item windows that exceed the maximum are closed, starting with items opened first. For example, if you had 4 item windows open and then set the layout to Side-by-Side, the layout would immediately change to side-by-side with only the two most recently items still open.
|