Display Multiple Item Windows

Contents
You can split the presentation window into multiple item windows to simultaneously present up to 4 different items at a time. The setting that determines this number is called the View Mode.
View Modes
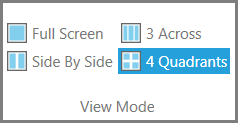
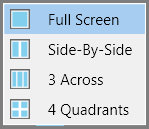
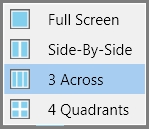
You can set the View Mode to:
| • | Full Screen |
| • | Side By Side |
| • | 3 Across |
| • | 4 Quadrants. |
Where can the View Mode be set?
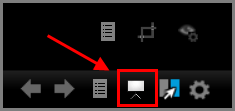
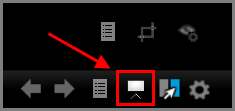
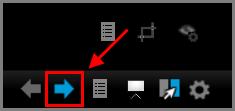
You can change the View Mode either from the main program window (HOME > Presentations > View Mode button group, which is active only when a presentation is showing. Or you can change the View Mode from within the presentation window itself.
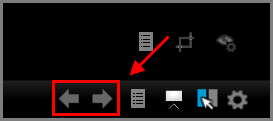
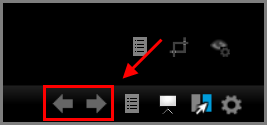
View Mode can be set in HOME > Presentations > View Mode button group.
View Mode can also be set in the Presentation Window
The View Mode determines the behavior of the presentation window in these ways:
| • | View Mode sets the upward limit to the number of item windows that can open. This term, upward limit is used here because the presentation screen always opens in Full Screen. If a different View Mode (Side By Side, 3 Across, or 4 Quadrant) is selected, the presentation window only divides into Side By Side, 3 Across, etc., each time you click the next item button. However, you can override this behavior by unlocking the Display Mode, which is discussed later in this topic. |
| • | As more item windows open, View Mode locks the action of the next and previous item buttons onto the most-recently opened item window. For example, if you set the View Mode to 3 Across, once the third item window is opened, the next and previous item buttons only act upon the third item window. |
It is possible to override this behavior and move between items in a different item window by unlocking the Display Mode. This is discussed next in this topic.
Overriding the View Mode by unlocking the Display Mode
When the View Mode is set to Side By Side, 3 Across, or 4 Quadrants, you can temporarily suspend new item windows from opening before you have reached the maximum allowed for that View Mode setting. You can also page through items in whichever item window is open, not just the most recently opened item window.
The setting you use to make these changes during your presentation is called the Display Mode.
How the Display Mode works
The Display Mode can be set to locked or unlocked. By default, it is set to locked. Unlocking the Display Mode has the immediate effect of preventing new item windows from opening. Unlocking the Display Mode also allows you to change the focus of the next and previous item buttons, so that clicking these buttons will effect whichever item window you select.
Where can the Display Mode be set?
Like the View Mode, you can control the Display Mode either from the main program window (HOME > Presentations > Display Mode button group) or from within the presentation window itself.
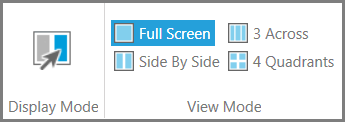
In the View Mode button group, by default Full Screen mode is selected.
Each time |
Each time |
In the View Mode button group, by default Full Screen mode is selected.
The Display Mode is locked
The Display Mode is unlocked
The next or previous item is displayed in the selected item window.
The next or previous item is displayed in the selected item window.If needed, return to the main program window and then click Display Mode again to lock it. |
Each time
Display Mode is unlocked
The next or previous item, relative to the item window, opens in the selected item window. |
These steps illustrate how to present 3 items simultaneously. The screen captures in the procedure are provided as examples.
The first item in the presentation opens.
The maximum number of item windows that can be open at one time will be 3
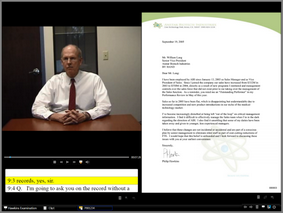
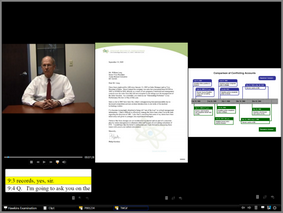
The presentation window is now divided into 2 item windows. The newly opened item window shows the second item in the presentation.
The presentation window is now divided into 3 item windows, the maximum that can be opened with the 3 Across view mode. This third item window shows the third item in the presentation. Each time you click |

|
The maximum number of item windows that may be opened is set to the current number of item windows open. |
You can flip though the items in your presentation like flipping through the pages of a book. This can be helpful when presenting the pages of a deposition of other multi-page print documents.
The first item in the presentation is displayed.
The presentation window changes to side-by-side view mode. The first item is in the left ttem window, the second in the right.
The presentation continues to flip forward, page by page. |